Monday, 1. April 2019
What should I do if I have dyspnoea and panic attacks? Most people with asthma have asked themselves this question at some point. But even people with other respiratory tract problems or even healthy people are sometimes short of breath. Munich-based physiotherapist Marlies Ziegler demonstrates exercises, which can help relieve panic and acute shortness of breath.
Marlies Ziegler: There are many different reasons why dyspnoea occurs. People with asthma can experience allergy- or infection-triggered asthma or exercise-induced asthma. Many patients with COPD, cystic fibrosis, primary ciliary dyskinesia and other respiratory diseases experience shortness of breath when exercising and in stressful situations. But even people who do not have a lung condition can experience dyspnoea. Dyspnoea is often accompanied by panic if patients feel they are suffocating, which people with asthma may experience. Of course, anyone who frequently experiences shortness of breath should have a doctor determine the reasons for this. But – regardless of the cause or clinical picture – there are tips and exercises which can help to get dyspnoea and panic under control when they happen.
Marlies Ziegler: Generally, in situations of respiratory distress, the principle of off-loading always applies. By this I mean bolstering your arms on something so your arm's weight is being transferred. The muscles that aid in respiration can then work better. There needs to be room in the abdomen so the diaphragm can move better. Both elements help patients to breathe more easily and get more air. Futhermore, it helps patients concentrate on breathing and to control it consciously. The respiratory rate can be reduced by deliberately breathing in and out slowly. This is calming and can therefore also reduces panic. One should inhale and exhale through the nose if possible. Alternatively, exhaling through the mouth using what is referred to as pursed lip breathing is often beneficial.
Nearly all of the exercises for dyspnoea which we are discussing in this interview are based on the principle of off-loading. When experiencing dyspnoea, it is always beneficial to position yourself in a way that makes it easier to breathe and to concentrate on your breathing. Positions that make breathing easier include off-loading while standing, the goalkeeper position, the sitting tripod position and a more upright version of the child’s pose. A technique called contact breathing helps you guide your breathing consciously. An exercise called pursed lip breathing helps calm your breathing.
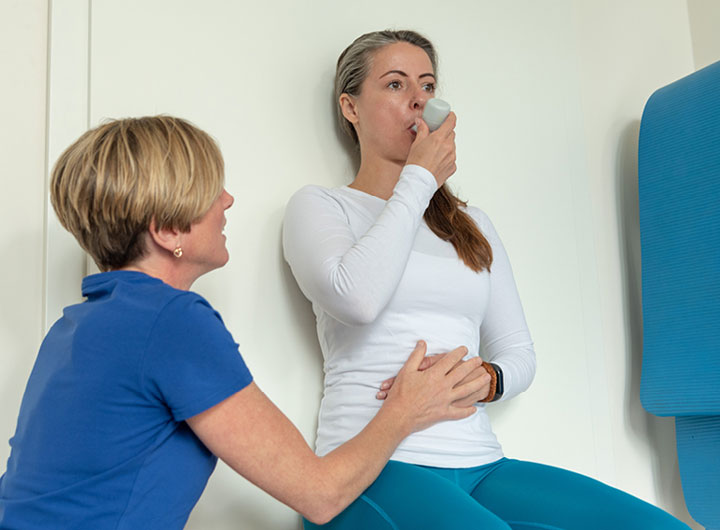
Dosed pursed lip breathing is a breathing technique which makes exhaling easier. It slows down the airflow, which makes the airways more stable and dilated while exhaling. In contrast, when airflow is not slowed down, there is the risk that the airways could collapse and constrict. It is often possible for inhalation after exhaling with pursed lips to be more relaxed and more air can get into the airways.
To do dosed pursed lip breathing have your lips loosely together. There should be a narrow opening between the lips through which the air can escape slowly and over a long period. What is important here is not to press your lips together, if possible have no tension in the lips and cheeks.
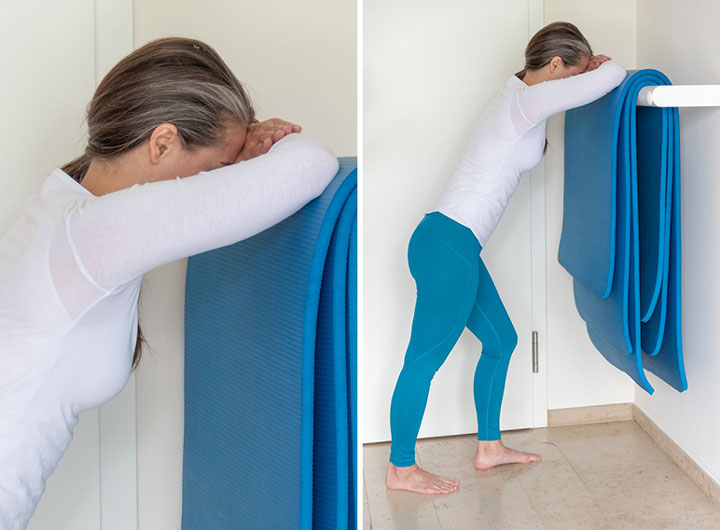
If the feeling of shortness of breath is worsening or you are already in acute respiratory distress then:
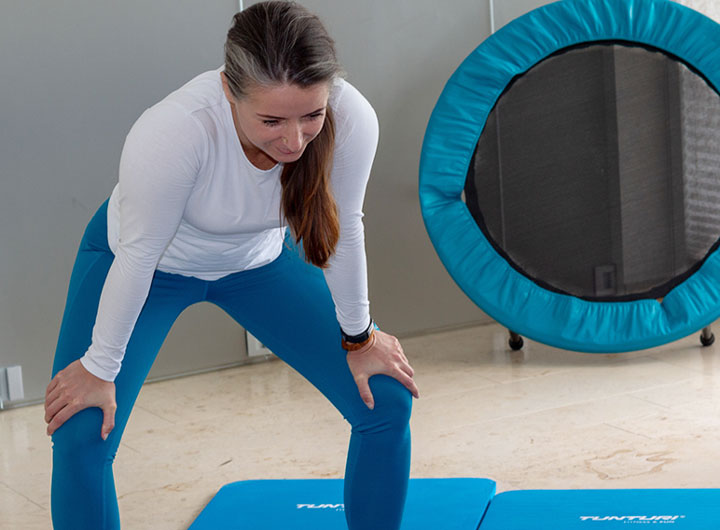
The standing tripod position is called goalkepper’s position in german this because it resembles a goalie’s stance when waiting for a shot on the goal. You are probably also familiar with this position with other athletes. After strenuous exertion, for example sprinting, athletes assume this stance.
How to do it:
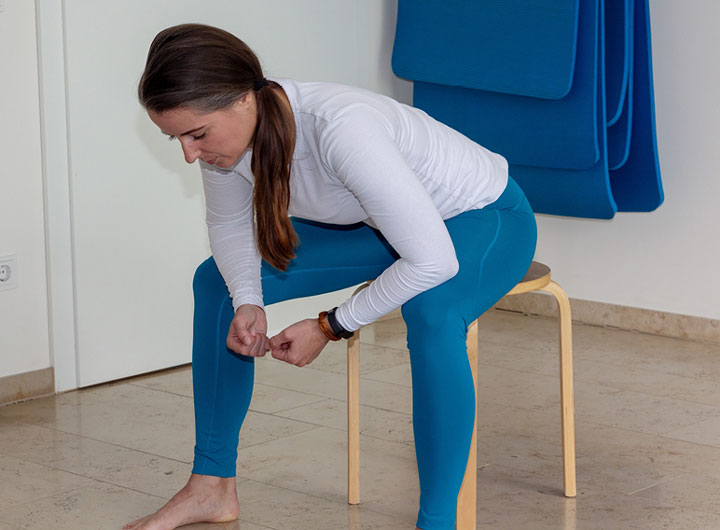
How to do it:
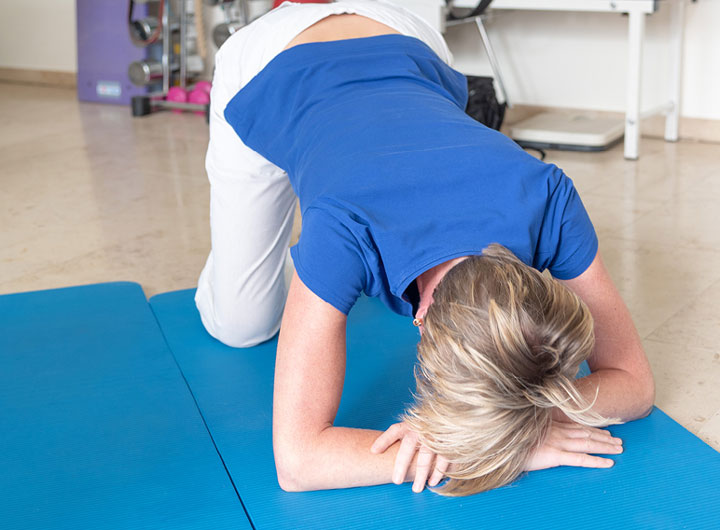
If the shortness of breath is combined with fatigue (and you are at home), of the positions used to help with breathing, the child’s pose can be a comfortable choice. This exercise requires a certain degree of flexibility though.
How to do it:
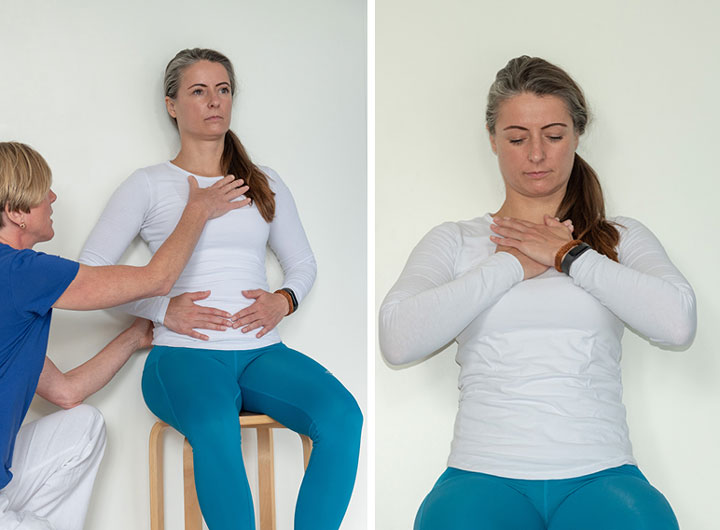
This exercise is advisable in particular when you are starting to panic due to the difficulty breathing. With contact breathing you concentrate solely on your breathing, which helps you calm down. Many people only breathe using their chests and have forgotten how to do belly breathing. But by consciously doing belly breathing, you can “breathe your panic away” or at least keep it in check. In general, contact breathing is an important breathing technique for all lung diseases. Contact breathing works as breath perception training and is the basis for guided breathing. Contact breathing promotes the feeling that you have your breathing in hand.
How to do it:
Marlies Ziegler works as a physiotherapist in private practice in Munich. She specialises in respiratory therapy. She has been treating patients with chronic obstructive and restrictive airway diseases such as asthma, COPD, cystic fibrosis (CF) and primary ciliary dyskinesia (PCD), for 20 years.
NOTE: The information in this blog post is not a replacement for treatment. The exercises described should be used as examples for respiratory therapy. PARI recommends that patients always coordinate with their doctor and physiotherapist.
An article written by the PARI BLOG editorial team.
© 2024 PARI GmbH Spezialisten für effektive Inhalation